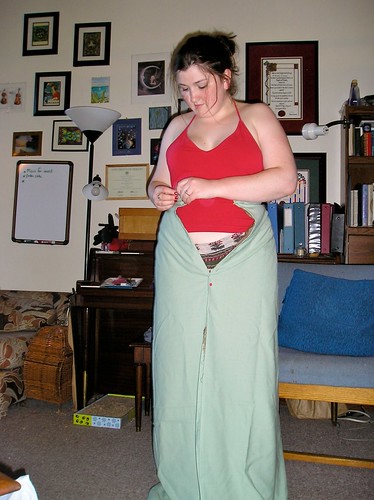
I used your basic rectangular construction, cutting the neckline fairly low and the front and side pieces as close as I thought I could get away with to encourage as much support as possible. I also doubled the fabric for the front of the shift down to the waist, I don't want to be putting on a free show, so to speak. I only put in side gores because I made this shift very short, just above the knee. The idea is to be COOL!
I was very proud of myself because this time I actually cut it keeping finished seams in mind. I finished off every single seam right form the beginning, so hopefully this shift will last a long time, even with machine washing!
Because of the low neckline, the top wasn't quite as supportive as I hoped it would be, so I had to make little tucks in the shoulder seams to provide a bit more support in the front. I think it's ok now.
Sorry, no pictures of me in just my skivvies!
After the shift, I plunged into the bodice. This was the nerve racking part. Kass's article is fairly step by step, but it expects to you discern a lot on your own. I has to make a choice between using the width of the fabric to go around my waist, and leave nearly 2 yards for the skirt, or cut the other direction, leaving less for the skirt. I decided to leave more for the skirt, so I used every inch for the bodice. I think in a perfect world I would have had another inch or so of fabric to wrap forward. It would have given a bit more support and a little more modesty, but what I ended up with still resembles the pictures enough that I'm satisfied. I lined the bodice section with itself, folded over, so there are no seams in the bodice. I used cuttings from around the bottom of the bodice (I'm so short waisted!) in order to bind around the edges and arm holes.
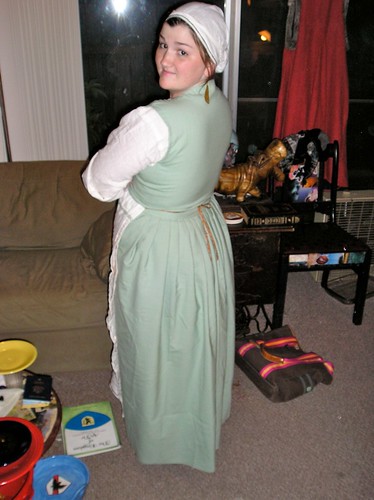
The rectangle of wool left for the skirt was just under two yards. I lined it with a brown striped linen (from Joanns!) The skirt is heavily pleated in the back to give the impression of a bum-roll, but falls flat in the front. Kass used rolled pleats to give it the fullness, but I think she is a bit of a smaller woman then me because I was having a very hard time getting the rolled pleats to give me enough space to wrap the skirt section around to meet in the front without massive puckering. I kept making the rolls smaller and smaller and eventually found a way that would work, by rolling only 2.5 inches of fabric into each pleat and then flattening the roll some. It's not as full as it could be, but was as full as I could get considering the amount of fabric I had.
Skirt puckering too much in the front.

Too much of the fabric in the pleats at the back. Doesn't look right.
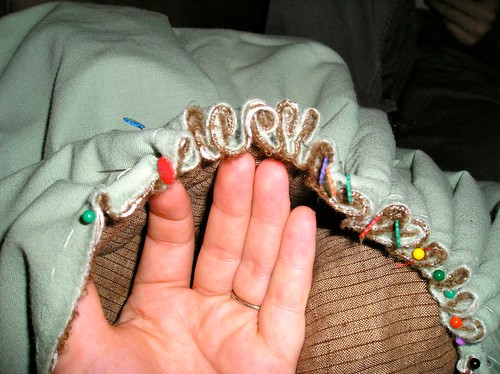
What I went with for pleating.
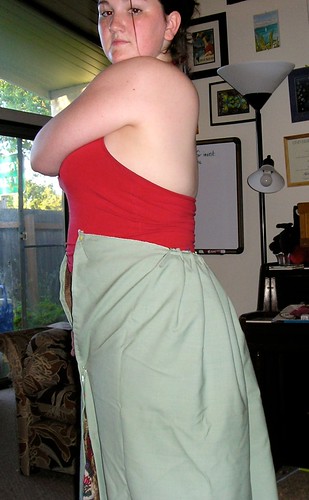
Much better!
After sewing the bodice and skirt together, I was really happy with how the pleats fell though I still wasn't satisfied with the amount of puckering I was getting along the center front seam due to how little fabric there was around the front so I cut the hem, and used the extra from around the bottom to add a small pannel in the center front and sleeves.
I really wanted to be able to have pin on sleeves so I could wear the dress at day or night, so I cut the sleeves first. The linen was less wide then the wool, so I ended up having to piece the lining. This left me a rectangle that i was able to cut into strips.
I sort of mish-mashed the panel together out of the left over pieces and had to be creative sewing it on to keep all the edges enclosed, but not take up any more of the fabric in a seam allowance then I had to.
Skirt attached, panel inserted, now I had to figure out lacing. I made a finger-loop braid out of some rust colored cotton to use to lace up the front. I wanted some brass rings to stitch into the front, rather then eyelets, to lace it through as that is what I have seen other people do for their gowns of this style. I picked some up at Springfield's Econo Fabrics. I have sewn three into each side, I set them even to one another, even though I'm spiral lacing. Right now this isn't warping the balence of the bodice, though I may change it after I wear the dress all day once or twice. I may need to add a fourth pair in order to keep the girls supported.
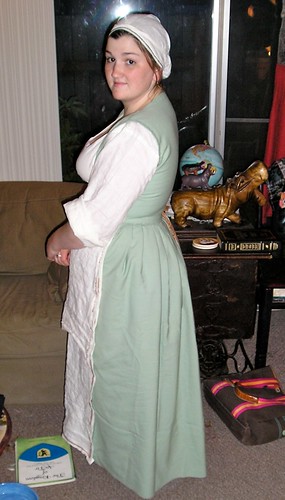
Final touches for the outfit are hemming and the apron. I'm still putting off hemming, mostly becaues it's too hot to iron right now, but I'm particularly excited about how the apron turned out.
I'll be honest, I relied almost exclusively on my own logic and ingenuity when making the apron. I used the full width of my white linen folded over so that the entire front of the kirtle was covered, which left a flap about to my knees as a second layer. I hemmed the edges, embroidering a simple chain to tack down the hem, and then sewed another strip of finger loop braid (a reject for the waist strip, I made it too short) along the top (where it ties on) creating a channel along the top for another strip of finger-loop braid to run around my waist and tie it on. It looks a little fancy, and I don't have evidence for that fancy of an apron, but I like it, so I'm keeping it. There isn't any evidence for this style of a dress to be worn without an apron, so I might as well look nice.
My final piece will be to make a partlet to wear over it and keep me modest.

Final look, sans hem and partlet.
Comments, questions, suggestions?

It looks really good! As far as the number of lacing rings to use for fastening it, what can you tell from period sources? Matching the number of lacing rings can help get the right look as well as ensure that you have adequate support. Don't just look at one source (unless that's all you can find), though, as different body types may or may not have an effect on the numbers!
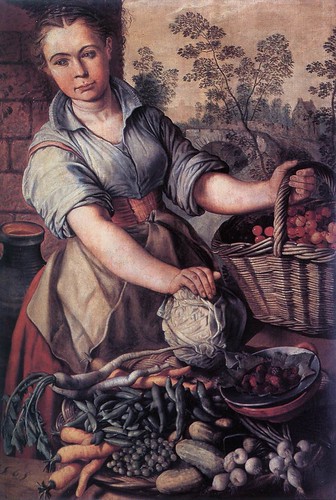
ReplyDeleteI'm with Alex there, look at the last scene you have (market girl) and the lacing rings on her dress, notice how close they are. I realize you probably wont have as many since you are really short waisted, but I would place the rings closer together.
ReplyDeleteThe back looks good, your choice for the pleats is great. I think you could have done the full rolled pleats if you had more fabric...but we make do with what we have.